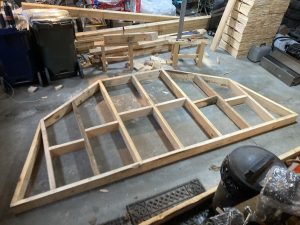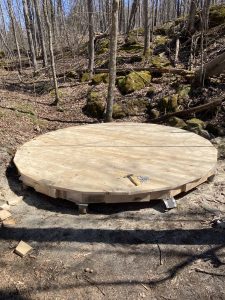
To help get things kickstarted I took a week off from work to build the floor platform. I had gotten the concrete piers poured in the fall so I knew they were out there waiting for their deck. There are seven important points that make up one half the floor. I started by marking the center point and then the 6 points along the hemisphere. I snapped a chalk line between them all on the garage floor so that I could cut everything to size without measuring, helpful when you’re working with rough sawn 2×6’s that vary in every possible dimension.
Once the 2×6’s are nailed together they get skinned with some 3/8” cdx plywood that will eventually become the bottom and hold in the insulation. You repeat the same steps again to make the matching pair and the two get nailed together once they’ve been brought out to site. I was grateful that I picked up a timber cart (timbercarts.com) because otherwise I have no idea how I would have moved the 13’x6.5’ sections. I attached a few temporary 2x6s that ensured that the platforms could sit well on the cart and moved them out back with incredible ease (500 ft into the woods and up a 20ft elevation climb).

The floor system is comprised of structural 2×6” tongue and groove. I ordered in long enough lengths so the center few pieces could be installed continuously from edge to edge. What I didn’t account for was how much Jenga I’d need to do towards the end of the floor layout. Next time I’ll definitely order 10% extra material for some of the crucial components.
The floor establishes the 20 points where the wall posts get installed. Using a nail in the center of the platform you mark out a 13’ diameter circle and subdivide it into 20 segments. 10 of them align with the points of the floor system underneath, the other 10 get beefed up with an additional 2×6 to provide support under the overhang. I messed something up, thought I’m still not quite sure what, because the floor pieces ended up overhanging without any support on the farthest two edges from the center. I added a second 2×6” in these areas not realizing how much trouble it would cause me when putting on the exterior walls later in the project (more on that later). Each building might be a little different but I think what I should have done is have 2 planks on either side of the center line vs. having a single board go down the center. My thought at the time is that a single board would make it easier to put a nail for marking the circumference.
I should note that up until this point I was doing much of the cutting with hand saws, having a preference for the quieter approach. But this building is for a customer, albeit one I’m married to, and my time is limited so I started to employ more power tools as the project progressed. I mention the hand tools specifically because a kind neighbor saw me out in the yard cutting the wall posts with a panel saw and offered the use of his compounding miter saw. He’s Irish so imagine being called daft in the kindest way possible, obviously I took him up on his offer. The saw made quick work of the wall posts, lintels, and skylight ring. All of which involved a number of compound angles that needed to be repeated 20-40 times.
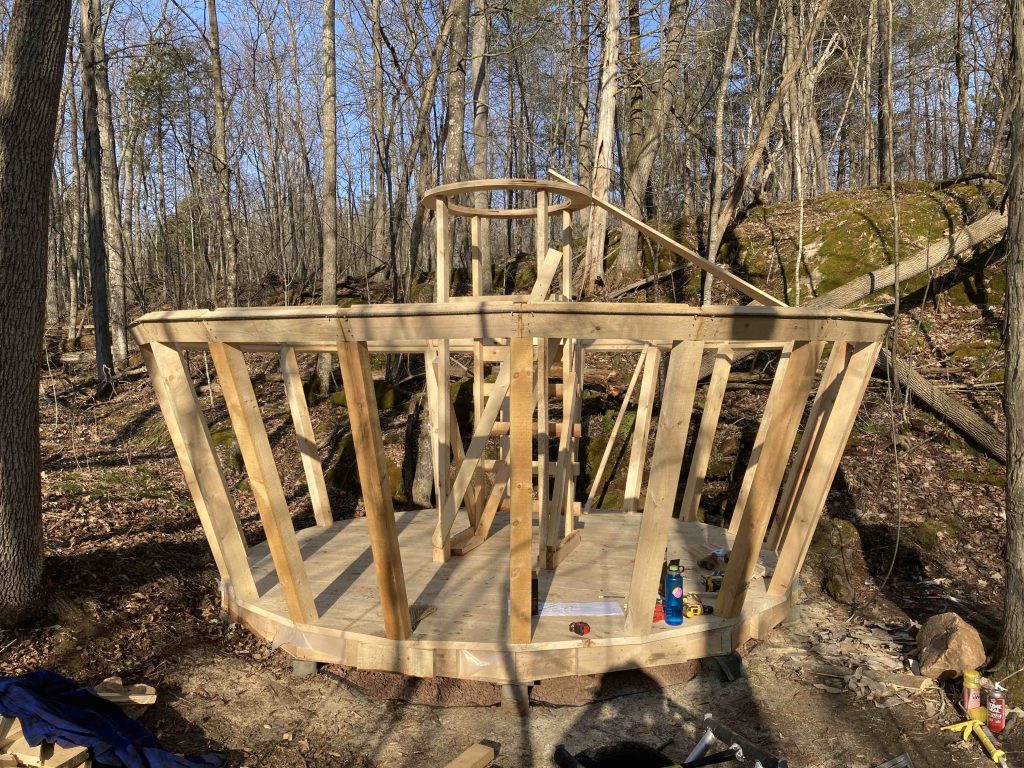
The wall posts get nailed to the floor at the 20 points that were previously defined and the lintels get attached above which help make sure the posts are all the same distance apart. All of this sounds a lot easier on paper, doing high altitude screwing or nailing overhead is challenging no matter how you slice it. I had cut the lintels with the bandsaw before my neighbor saw me struggling so the angles wandered a little bit, not quite the right tool for compound cuts. In the end, and with the help of a few wedges, everything came together well enough.
Around the upper perimeter of the lintels you install a 3/8” galvanized steel cable. That was one of the more challenging pieces to source. I lucked out in finding a local rigging company that was willing to sell me 60ft and a couple of clamps.
Last thing that needed doing before working on the roof was building a tower in the center of the platform. It does double duty as a ladder and platform to provide access to the higher parts of the structure as well as defining a 4ft radius at the exact right hight (105.5”) for the ceiling and roof to work to plan.

